How To Read Architectural Scale For Beginners | Simple Steps
Learn how to read architectural scale for beginners with a simple find, match, zero, read, and verify method for plans and blueprints.
Author:George EvansJul 12, 2026
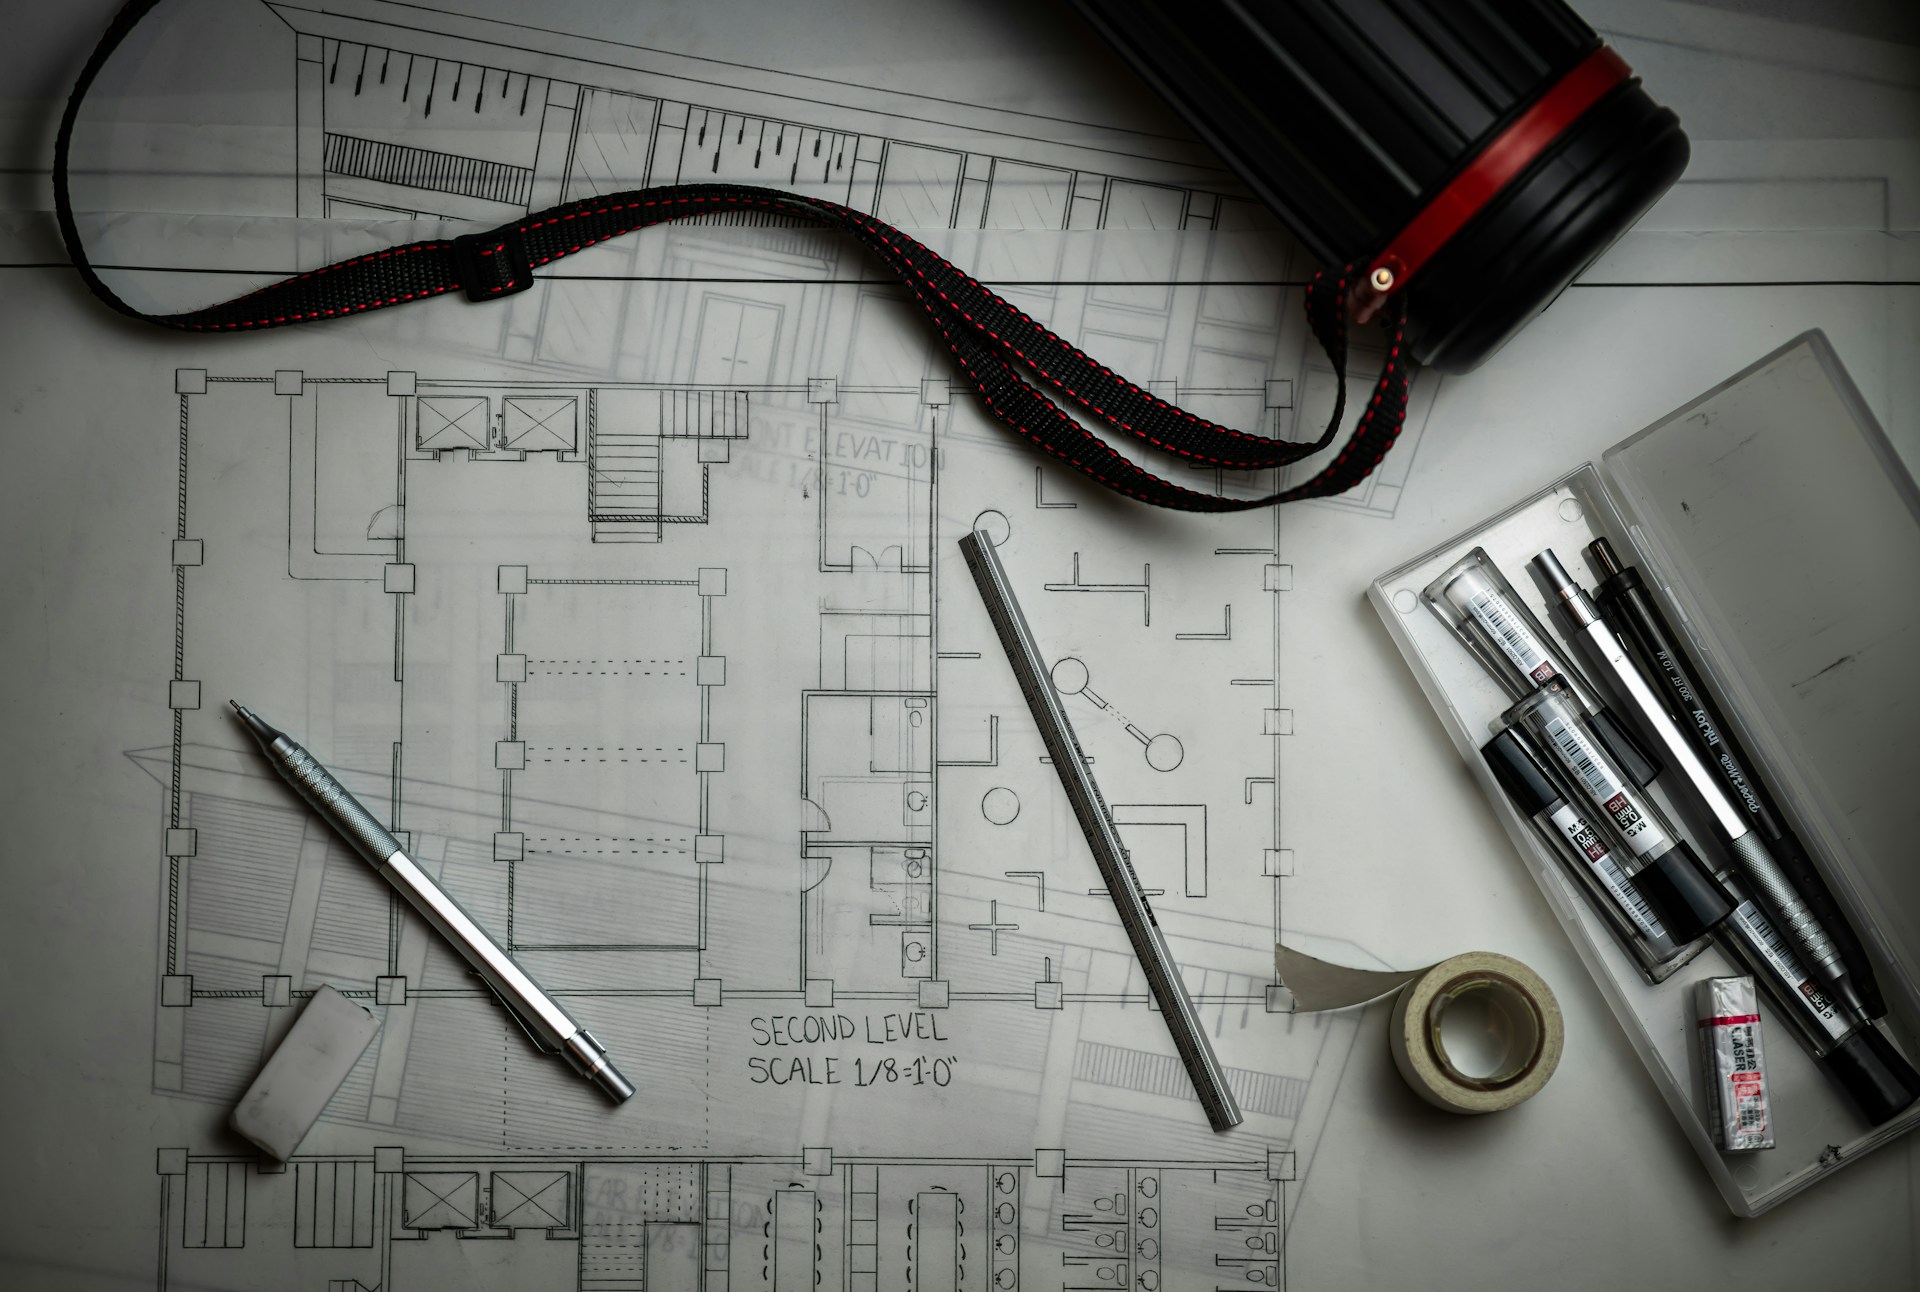
Understanding Architectural Scale For Beginners
Architectural scale can feel confusing at first because the ruler does not behave like a normal ruler. The numbers may run in two directions; the zero mark may sit away from the edge, and the drawing may say something strange like 1/4" = 1'-0".
If you are learning how to read architectural scale for beginners, the good news is that the process follows a simple pattern. Once you know how to find the scale, match it to the ruler, start at zero, and check the result, floor plans and basic blueprints become much easier to read.
Architectural drawings use scale because buildings are too large to fit on paper at full size. Scale lets a wall, room, or full building plan fit on a page while still keeping the real measurements in proportion.
Quick Answer: How To Read Architectural Scale For Beginners
- Find the scale printed on the drawing, usually in the title block, under the drawing view, or beside a scale bar.
- Match that exact scale to the correct side of your architect scale ruler.
- Place the zero mark at the start of the wall, room, or object you want to measure.
- Read the whole-foot number where the object ends, then add inches using the small marks near zero.
- Check the result against written dimensions, because printed or resized drawings may not measure correctly.
The simple rule is this: find, match, zero, read, verify.
What Is Architectural Scale?
Architectural scaleis a way to show a real building at a smaller size while keeping the same proportions. A wall, room, door, or window is drawn smaller on paper, but its relationship to the rest of the building stays accurate.
Why Buildings Are Drawn Smaller Than Real Life
A real house, office, or shop cannot fit on a sheet of paper at full size. Scale solves that problem.
Instead of drawing a 12-foot wall as 12 real feet on paper, the drawing may show it as 3 inches long. If the drawing scale is 1/4" = 1'-0", every quarter inch on paper represents one real foot.
This keeps the drawing useful without making it enormous.
What “To Scale” Means
To scale” means the drawing has a fixed relationship to the real object. If one wall is twice as long as another wall in real life, it should also look twice as long on the drawing.
In simple terms, scale works like a visual reference system; just as a multiplication tables charthelps learners see number relationships quickly, an architectural scale helps readers understand size relationships on a drawing.
Metric scale works the same way. RMIT Learning Lab explains that a scale such as 1:100 means measurements on the drawing represent a fixed fraction of actual size. For example, 1 centimetre on a 1:100 drawing represents 1 metre in real life.
Drawing Size Vs Real Size
The drawing size is what you measure on the paper. The real size is what that measurement means in the building.
For example:
| Drawing Measurement | Real Measurement |
| 1/4 inch on a 1/4" scale drawing | 1 foot in real life |
| 1 inch on a 1/4" scale drawing | 4 feet in real life |
| 1 cm on a 1:100 drawing | 1 metre in real life |
| 1 cm on a 1:50 drawing | 0.5 metre in real life |
The key takeaway is simple: the ruler is not just measuring paper. It is translating paper size into real building size.
The Parts Of An Architectural Scale Ruler
An architect scale ruler usually has several scales on different edges. East Tennessee State University’s CADD open educational resource explains that architect scales are used for drawings dimensioned in feet and inches and may include multiple scales on one ruler.
The Zero Mark
The zero markis where you begin measuring. It is not always at the physical end of the ruler.
This is one of the biggest beginner mistakes. A normal ruler starts at the edge, but an architect scale may place zero inside the scale, with smaller inch marks extending to one side.
Always look for the zero before placing the ruler.
Whole-Foot Numbers
The larger numbers on an imperial architect scale usually represent whole feet. If you are using the 1/4" scale and the measured wall ends at 12, the wall is 12 feet long.
Do not read the number as inches on paper. Read it as the real-world distance represented by that scale.
Small Marks For Inches Or Fractions
The small marks near zero are used for inches or partial feet. They help you read measurements like 12 feet 6 inches instead of only 12 feet.
For beginners, this is where the ruler feels strange. You often read whole feet on one side of zero and inches on the smaller divided section.
Why Some Scales Read Left To Right And Others Right To Left
Many triangular architect scales share one edge between two scales. One scale may read left to right, while another reads right to left.
This saves space on the ruler, but it can confuse beginners. The fix is simple: use the zero mark for your chosen scale and read in the direction where the numbers increase.
The ruler becomes much easier once you stop treating every edge as one normal ruler.
Where To Find The Scale On Architectural Drawings
A drawing sheet can include floor plans, elevations, sections, enlarged details, and schedules. Each view may use a different scale, so the first job is to find the scale for the exact view you want to measure.
Check The Title Block
The title block is usually found along the edge or bottom of a drawing sheet. It may include the project name, drawing title, sheet number, date, and scale.
The U.S. Fire Administration notes that the scale may appear in the title block, but plans can also include multiple scales. That means the title block is a starting point, not always the final answer.
Check The Label Under The Specific Drawing
If a sheet has more than one drawing view, check the label under the exact drawing. A floor plan may be 1/8" = 1'-0", while a wall detail on the same sheet may be 1 1/2" = 1'-0".
This matters because using the wrong scale gives you the wrong real-world size.
Check The Scale Bar
A scale bar is a printed visual ruler on the drawing. It helps you check whether the drawing has been printed or displayed correctly.
If a plan has a scale bar, measure the scale bar first. If the printed scale bar does not match your ruler, the sheet may have been resized.
Watch For Multiple Scales On One Sheet
One sheet can contain several scales. This is common in construction drawings because large plans and small details need different levels of detail.
For example:
- A site plan may use a small scale.
- A floor plan may use a medium scale.
- A cabinet detail may use a large scale.
- A section detail may use a different scale again.
The takeaway is clear: measure the view, not just the sheet.
How To Use An Architect Scale Ruler Step By Step
Think of the scale ruler as a translation tool. It translates a short line on paper into a real building dimension.
Step 1: Find The Drawing Scale
Look for the scale printed in the title block, view label, legend, or scale bar.
Common imperial examples include:
- 1/4" = 1'-0"
- 1/8" = 1'-0"
- 3/16" = 1'-0"
- 1/2" = 1'-0"
Common metric examples include:
- 1:50
- 1:100
- 1:200
- 1:500
Do not measure until you know which one applies.
Step 2: Match The Scale On Your Ruler
Find the same scale on your ruler. If the drawing says 1/4" = 1'-0", use the side marked 1/4. If the drawing says 1:50, use the 1:50 edge on a metric scale ruler.
This is where beginners often go wrong. A ruler edge may look close enough, but “close” is not accurate in scaled drawings.
Step 3: Place Zero At The Start Point
Place the zero mark at the beginning of the wall, room, or object.
Do not place the physical end of the ruler at the start unless the zero mark is also there. The zero mark is your true starting point.
Step 4: Read The Whole-Foot Number
Look where the object ends on the ruler. If it lands on 10, 12, or 18, that usually means 10 feet, 12 feet, or 18 feet on an imperial architect scale.
Read the number from the correct direction. If the scale numbers run right to left, you must read right to left.
Step 5: Add Inches From The Smaller Marks
If the object does not end exactly on a whole-foot mark, use the smaller marks near zero to add inches.
For example, a wall might read 12 feet plus 6 inches. In construction notation, that is written as 12'-6".
Step 6: Check The Measurement Against Written Dimensions
Written dimensions should usually be trusted before manual scale measurements. A scaled measurement can be affected by printing, copying, PDF resizing, or screen zoom.
The U.S. Fire Administration’s scale training material also warns that scale exercises depend on printing at actual size, which supports the need to verify print accuracy before relying on manual scale readings.
Here is the beginner checklist:
| Before You Measure | Why It Matters |
| Find the correct view scale | One sheet may contain several scales |
| Match the ruler edge exactly | The wrong edge gives the wrong dimension |
| Start from zero | The ruler end may not be zero |
| Read in the correct direction | Some scales run opposite ways |
| Check written dimensions | Manual measurements can be distorted |
The method is simple, but the checks matter.
Worked Example: How To Read 1/4" = 1'-0" Scale
At 1/4" = 1'-0", one quarter inch on the drawing represents one real foot. So 1 inch on the drawing represents 4 real feet.
What 1/4" = 1'-0" Means
The notation means:
- 1/4 inch on paper equals 1 foot in real life.
- 1 inch on paper equals 4 feet in real life.
- 3 inches on paper equals 12 feet in real life.
You do not need to calculate this every time if you have an architect scale ruler. The ruler does the conversion for you.
Measuring A 12-Foot Wall
Imagine a beginner is reading a small floor plan. The drawing says Scale: 1/4" = 1'-0".
They place the zero mark at one end of a wall. The other end lines up with 12 on the 1/4 scale.
That wall is 12 feet long.
Reading 12 Feet 6 Inches
Now imagine the same wall extends past 12 but not all the way to 13.
The reader checks the small marks near zero and sees that the extra length is 6 inches. The wall is 12'-6", or 12 feet 6 inches.
This is the moment many beginners understand the ruler. Whole feet come from the main scale, and inches come from the smaller divided section.
Worked Example: How To Read 1/8" = 1'-0" Scale
At 1/8" = 1'-0", one-eighth inch on the drawing represents one real foot. This makes the drawing smaller than a 1/4" scale drawing.
What 1/8" = 1'-0" Means
The notation means:
- 1/8 inch on paper equals 1 foot in real life.
- 1 inch on paper equals 8 feet in real life.
- 2 inches on paper equals 16 feet in real life.
This scale is useful when the building or plan area is too large for 1/4" scale.
Why Smaller Scales Show Larger Areas
A “smaller scale” shows more of the building but less detail. A “larger scale” shows less of the building but more detail.
For example, a whole house may fit at 1/8" scale. A kitchen cabinet detail may need a larger scale so small parts are easier to read.
Beginner Practice Example
Imagine a room wall on a 1/8" scale drawing. You place the zero mark at one end and the wall reaches the 16 mark.
The wall is 16 feet long.
If the same wall were measured with the 1/4" side by mistake, the answer would be wrong. That is why matching the printed scale to the ruler edge is not optional.
How To Read Metric Architectural Scale
In metric drawings, the scale tells you how many real units are represented by one drawing unit. RMIT Learning Lab explains that floor plans are commonly produced at 1:50 or 1:100 of actual size, while site plans may use smaller scales such as 1:200 or 1:500.
What 1:50 Means
A 1:50 scalemeans one unit on the drawing equals 50 of the same units in real life.
For example:
- 1 millimetre on the drawing equals 50 millimetres in real life.
- 10 millimetres on the drawing equals 500 millimetres in real life.
- 20 millimetres on the drawing equals 1,000 millimetres, or 1 metre, in real life.
What 1:100 Means
A 1:100 scale means one unit on the drawing equals 100 of the same units in real life.
A simple way to remember it is this: at 1:100, 1 centimetre on the drawing equals 1 metre in real life.
That makes 1:100 useful for general plans, while 1:50 often shows more detail.
Metric Example: Measuring A 4-Metre Room Wall
Imagine a room wall on a 1:50 drawing. On paper, the wall measures 80 millimetres.
Multiply 80 millimetres by 50:
80 mm × 50 = 4,000 mm
4,000 mm equals 4 metres. So the real wall is 4 metres long.
Why Metric Scale Is Often Easier For Beginners
Metric scale uses consistent units, which can make the math clearer. You are not switching between inches, feet, and fractions.
The main rule is to keep the units consistent. If you measure in millimetres, calculate in millimetres before converting to metres.
Metric scale is still only reliable when the drawing is printed, displayed, or plotted correctly.
Common Architectural Scales And What They Are Used For
Use this table as a beginner reference, not as a strict rule. Project standards can vary.
| Scale | Common Use |
| 1/4" = 1'-0" | Floor plans, small building plans, interior layouts |
| 1/8" = 1'-0" | Larger floor plans or building layouts |
| 1/2" = 1'-0" | Enlarged plans or details |
| 1:100 | General floor plans and building plans |
| 1:50 | Room plans, interiors, smaller plans |
| 1:20 / 1:10 | Detail drawings |
Larger-scale drawings usually show more detail. Smaller-scale drawings usually show more area.
The right scale depends on what the drawing needs to communicate.
Architect Scale Vs Engineer Scale
An architect scale is usually used for building drawings. An engineer scale is commonly used for civil, site, grading, and infrastructure drawings.
What An Architect Scale Is Used For
An architect scale is commonly used for drawings measured in feet and inches. It is suited to building plans, elevations, sections, and details.
ETSU’s CADD material describes the architect scale as a tool for measuring drawings dimensioned in feet and inches.
What An Engineer Scale Is Used For
An engineer scaleusually uses decimal divisions. It is common on civil drawings, site plans, utility plans, and engineering layouts.
The U.S. Fire Administration training material covers both architect and engineer scales because plan reviewers may need to read both building drawings and civil engineering plans.
How To Avoid Picking The Wrong Ruler
Check the drawing notation first.
- If the drawing says 1/4" = 1'-0", use an architect scale.
- If the drawing uses decimal-style scales for civil distances, it may need an engineer scale.
The safest rule is to match the scale printed on the drawing to the label on the ruler.
When Not To Trust Your Scale Reading
A printed plan, copied plan, screenshot, or PDF can look normal but still be out of scale. This is why written dimensions, professional instructions, and clearer visual alignment before constructionmatter when different people are reading the same drawings.
The Drawing Was Printed Fit-To-Page
“Fit to page” can shrink or enlarge the drawing to match the printer paper. That changes the measured size on paper.
If the drawing was supposed to be printed at actual size but was printed fit-to-page, your scale ruler may give a false reading.
The PDF Was Resized
A PDF can be exported, compressed, enlarged, or reduced. If that happens, the scale note may still say 1/4" = 1'-0", but the drawing may no longer measure that way.
A scale bar can help. If the scale bar does not measure correctly, do not rely on the ruler reading.
The Screenshot Is Not To Scale
Screenshots are not reliable for scale measurement. Zoom level, screen size, image compression, and cropping can all distort the drawing.
Use screenshots for visual reference, not construction measurement.
Written Dimensions Override Manual Measurements
When a drawing has written dimensions, those dimensions should be treated as the stronger source. Manual scale readings are useful for checking and estimating, but they are not the same as dimensioned construction information.
This is especially important for walls, openings, stairs, structural elements, and code-related dimensions.
Ask A Professional For Construction-Critical Decisions
For anything that affects cost, structure, safety, permits, or installation, ask the appropriate professional. If the project is commercial or complex, it may also be worth learning how to choose a commercial architectbefore relying on drawings for major decisions.
A beginner-scale reading should not replace the work of an architect, engineer, contractor, or official plan reviewer.
The practical takeaway is this: scale is a reading skill, not a substitute for verified project information.
Beginner Mistakes To Avoid When Reading Architectural Scale
Scale reading gets easier when you know the traps.
Starting At The End Of The Ruler Instead Of Zero
Do not assume the end of the ruler is the starting point. Find the zero mark for the scale you are using. If you start at the ruler edge instead of zero, the whole measurement may be wrong.
Using The Wrong Side Of The Ruler
A triangular architect scale has several edges and several scales. The wrong edge may still produce a number, but it will not be the correct number. Always match the drawing scale to the ruler label.
Reading The Wrong Direction
Some scales increase from left to right. Others increase from right to left. Before measuring, check which direction the numbers increase from zero.
Ignoring The Drawing Label
Do not rely only on the sheet title. A detail, section, or enlarged plan may have its own scale label. Use the scale printed under the exact drawing view.
Forgetting That Details May Use A Different Scale
Details often use larger scales because they show small construction parts. A wall section, stair detail, or cabinet detail may not match the floor plan scale. Treat each view as its own measurement area.
Measuring A Reduced Or Enlarged Print
A reduced print can ruin an otherwise correct reading. This often happens when drawings are printed on smaller paper than intended. If accuracy matters, check the scale bar or printed sheet size first. Avoiding these mistakes is just as important as knowing the scale formula.
Quick Practice Exercise For Beginners
Use any simple floor plan with a clear printed scale, or draw a rectangle and label it with a practice scale.
Practice 1: Read A Straight Wall
Pick one straight wall on a floor plan. Find the printed scale and match it to your ruler.
Place zero at one end of the wall. Read the whole-foot number where the other end lands.
Practice 2: Read A Window Opening
Find a window or door opening. Measure the opening width using the correct scale.
Then compare it with any written dimension near the opening. If the written dimension and scale reading disagree, trust the written dimension.
Practice 3: Compare Two Scales
Measure the same line using the correct ruler edge, then measure it again with the wrong scale edge.
The wrong result will show why guessing the ruler side is risky.
Practice 4: Check Your Answer Against A Written Dimension
Find a wall with a written dimension. Measure it manually with the scale ruler.
Your reading should be close, but the written dimension is the stronger answer. This practice teaches both measurement and judgment.
A beginner becomes accurate not by rushing, but by repeating the same careful process.
Architectural Scale Cheat Sheet
- Find the scale for the exact drawing view.
- Match that scale on your ruler.
- Start at zero, not at the ruler edge.
- Read whole feet first on imperial architect scales.
- Add inches using the smaller divided marks.
- Use ratios for metric scales, such as 1:50 or 1:100.
- Check the scale bar if the drawing was printed or exported.
- Trust written dimensions first when accuracy matters.
The cheat sheet is simple because the process should be simple: find, match, zero, read, verify.
People Also Ask
What Does Architectural Scale Mean?
Architectural scale means a drawing is reduced in a fixed ratio so a real building, room, or detail can fit on paper while keeping accurate proportions.
How Do You Read An Architect Scale Ruler?
Find the drawing scale, choose the matching ruler side, place zero at the start point, read the whole number, then add any smaller inch marks.
What Does 1/4 Inch Equals 1 Foot Mean?
It means one quarter inch on the drawing represents one real-life foot. On that scale, one inch on paper represents four feet.
What Does 1:50 Mean On A Plan?
A 1:50 scale means one unit on the drawing equals 50 of the same units in real life. For example, 1 millimetre represents 50 millimetres.
Can I Use A Normal Ruler?
Yes, but an architect scale ruler is easier because it converts the drawing length into real building dimensions without extra calculation.
Final Thoughts
Before measuring a real architectural drawing, pause for a few seconds and run through the basics. Find the correct scale, match the ruler, start at zero, read in the right direction, and check your result.
Architectural scale is not difficult once you understand its purpose. The ruler is not asking you to measure paper like a normal ruler; it is helping you translate a small drawing into real-world size.
The most important habit is verification. Use scale readings to understand the drawing, but trust written dimensions, scale bars, correct print settings, and professional guidance when accuracy matters.
Jump to
Understanding Architectural Scale For Beginners
What Is Architectural Scale?
The Parts Of An Architectural Scale Ruler
Where To Find The Scale On Architectural Drawings
How To Use An Architect Scale Ruler Step By Step
Worked Example: How To Read 1/4" = 1'-0" Scale
Worked Example: How To Read 1/8" = 1'-0" Scale
How To Read Metric Architectural Scale
Common Architectural Scales And What They Are Used For
Architect Scale Vs Engineer Scale
When Not To Trust Your Scale Reading
Beginner Mistakes To Avoid When Reading Architectural Scale
Quick Practice Exercise For Beginners
Architectural Scale Cheat Sheet
People Also Ask
Final Thoughts

George Evans
Author
George Anderson, an exceptional architectural designer, envisions and brings to life structures that transcend the realm of imagination. With an unwavering passion for design and an innate eye for detail, George seamlessly blends form and function, creating immersive spaces that inspire awe.
Driven by a deep appreciation for the interplay of space, light, and materials, George's innovative approach redefines the possibilities of architectural design. His visionary compositions leave an indelible mark, evoking a sense of wonder and transforming the built environment.
George Anderson's transformative designs and unwavering dedication continue to shape the architectural landscape, pushing the boundaries of what is possible and inspiring generations to come.
Latest Articles
Popular Articles